
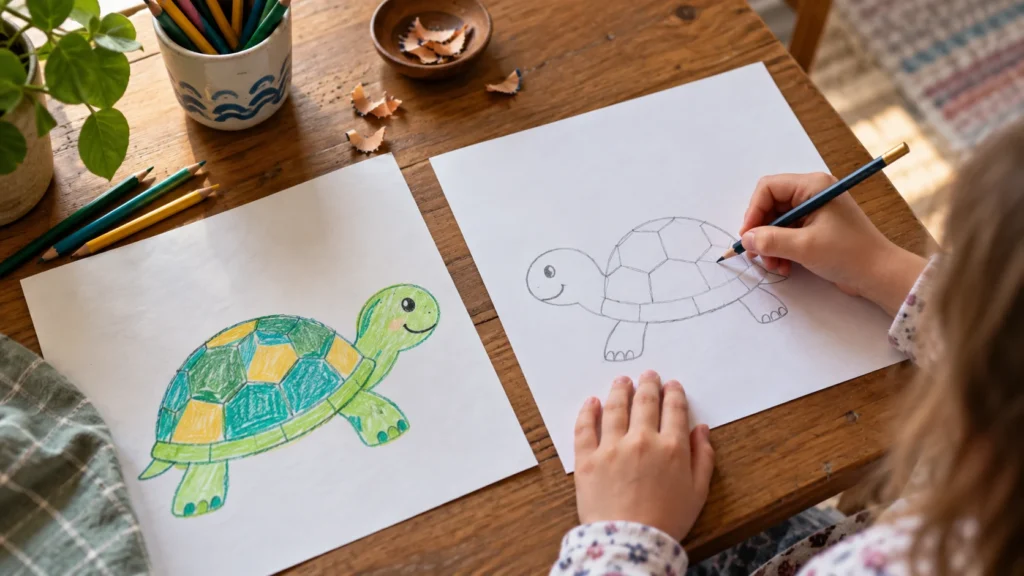
Directed drawing gives children a helpful starting point without deciding every detail for them. A simple picture is divided into small steps, and children add one shape or feature at a time. When the basic drawing is finished, they choose their own colors, background, and extra details.
In this activity, children draw a friendly turtle in six manageable steps and turn it into an original underwater, beach, or pond picture.
Why a Turtle Is a Useful First Animal Drawing
Directed drawing is a guided art activity. An adult or visual guide demonstrates one step, pauses, and lets the child try it. The goal is not to make every picture identical. The structure helps children observe shapes and plan a drawing while the creative choices remain theirs.
This activity develops pencil control, listening, shape recognition, confidence, and oral language. Children who need line practice may enjoy these pre-writing worksheets first.
Build the Turtle from Shell to Flippers
1. Draw the shell
Begin with a wide oval. It does not need to be perfectly smooth.
2. Add the head
Draw a small circle beside the shell and connect it with two short neck lines.
3. Add four flippers
Use small oval or leaf shapes near the front and back.
4. Draw the face and tail
Add one eye, a curved smile, and a small triangle for the tail.
5. Decorate the shell
Draw sections, spots, swirls, stripes, or a geometric pattern.
6. Create a scene
Add bubbles, water, sea grass, sand, rocks, or another turtle.
Look Closely at a Real Turtle Shape
Before drawing, compare the turtle’s broad shell with its smaller head and short flippers. Ask which part takes up most of the page. Children often make the head too large because they begin with facial details. Starting with the shell establishes proportion and leaves room for the remaining parts.
Shell-Pattern Experiment
Divide a spare oval into large sections, then try dots, curved lines, spirals, or repeated shapes in each section. This separates pattern practice from the final drawing and helps children notice that decoration should follow the curve of the shell.
Download the Free Directed Drawing Worksheet
The two-page A4 printable includes all six steps and a large turtle scene for drawing and coloring.
Download the Free Turtle Directed Drawing Worksheet
When the Shell, Head, or Flippers Look Uneven
Show one step at a time. Draw slowly and describe the movement in plain language. Avoid erasing every imperfect line. Children can turn an extra mark into a bubble, rock, or pattern.
For another creative activity, try the trace and color symmetrical pictures.
Turtle Drawing Readiness Check
The lesson is successful when the child can draw a recognizable turtle from a large oval, place the head and four flippers around it, and add a personal shell pattern without copying every line. A perfectly even drawing is not required; the goal is planning shapes and explaining the choices made.
Questions Children Ask While Drawing a Turtle
What age is this activity for?
It suits many children ages four to seven. Younger learners may copy the main shapes, while older children can add a detailed background.
Do all turtles need to be green?
No. Children may study real turtle colors or use imaginative colors.
Turn the Turtle into a Habitat Picture
The six steps provide structure, but the finished artwork belongs to the child. Notice how differently every artist interprets the same prompt.
Download the Free Turtle Directed Drawing Worksheet

Related Worksheets:
 Apple Directed Drawing for Kindergarten (Free Step-by-Step Worksheet)
 Easy Fall Leaf Directed Drawing for Kindergarten (Free Worksheet)
 How to Draw a Friendly Pumpkin for Kids (Free Worksheet)
 Donut Color by Number – Fun Coloring Activity for Kids
 Mga Kulay sa Filipino para sa Kindergarten (Libreng Gawaing-Papel)
 Pear Dot Marker Worksheets – Fun Dab and Dot Activity for Kids